Information stored on a computer is mostly of vital importance to us – may it be music, movies, family pictures, or business documents.
It’d be an awful nightmare to wake up one fine morning and see your computer crash leading to the loss of all your data. It is important to understand that running into computer nuisance is unavoidable, which could be caused by improper user handling, virus infection, or hardware failures.
Therefore, making data backups of your information is crucial. Windows 7 provides inbuilt backup/restore software that collects your data, compresses it, and stores it on an external hard drive or any other medium. Unlike copying and pasting data, backups compress your data and give an easy recovery course.
Backups can also be taken at networked locations (available only in Windows Professional, Enterprise, or Ultimate Edition).
Backup your data in Windows 7
The following steps will systematically guide you through the procedure of taking a data backup of your Windows 7 machine.
Step 1
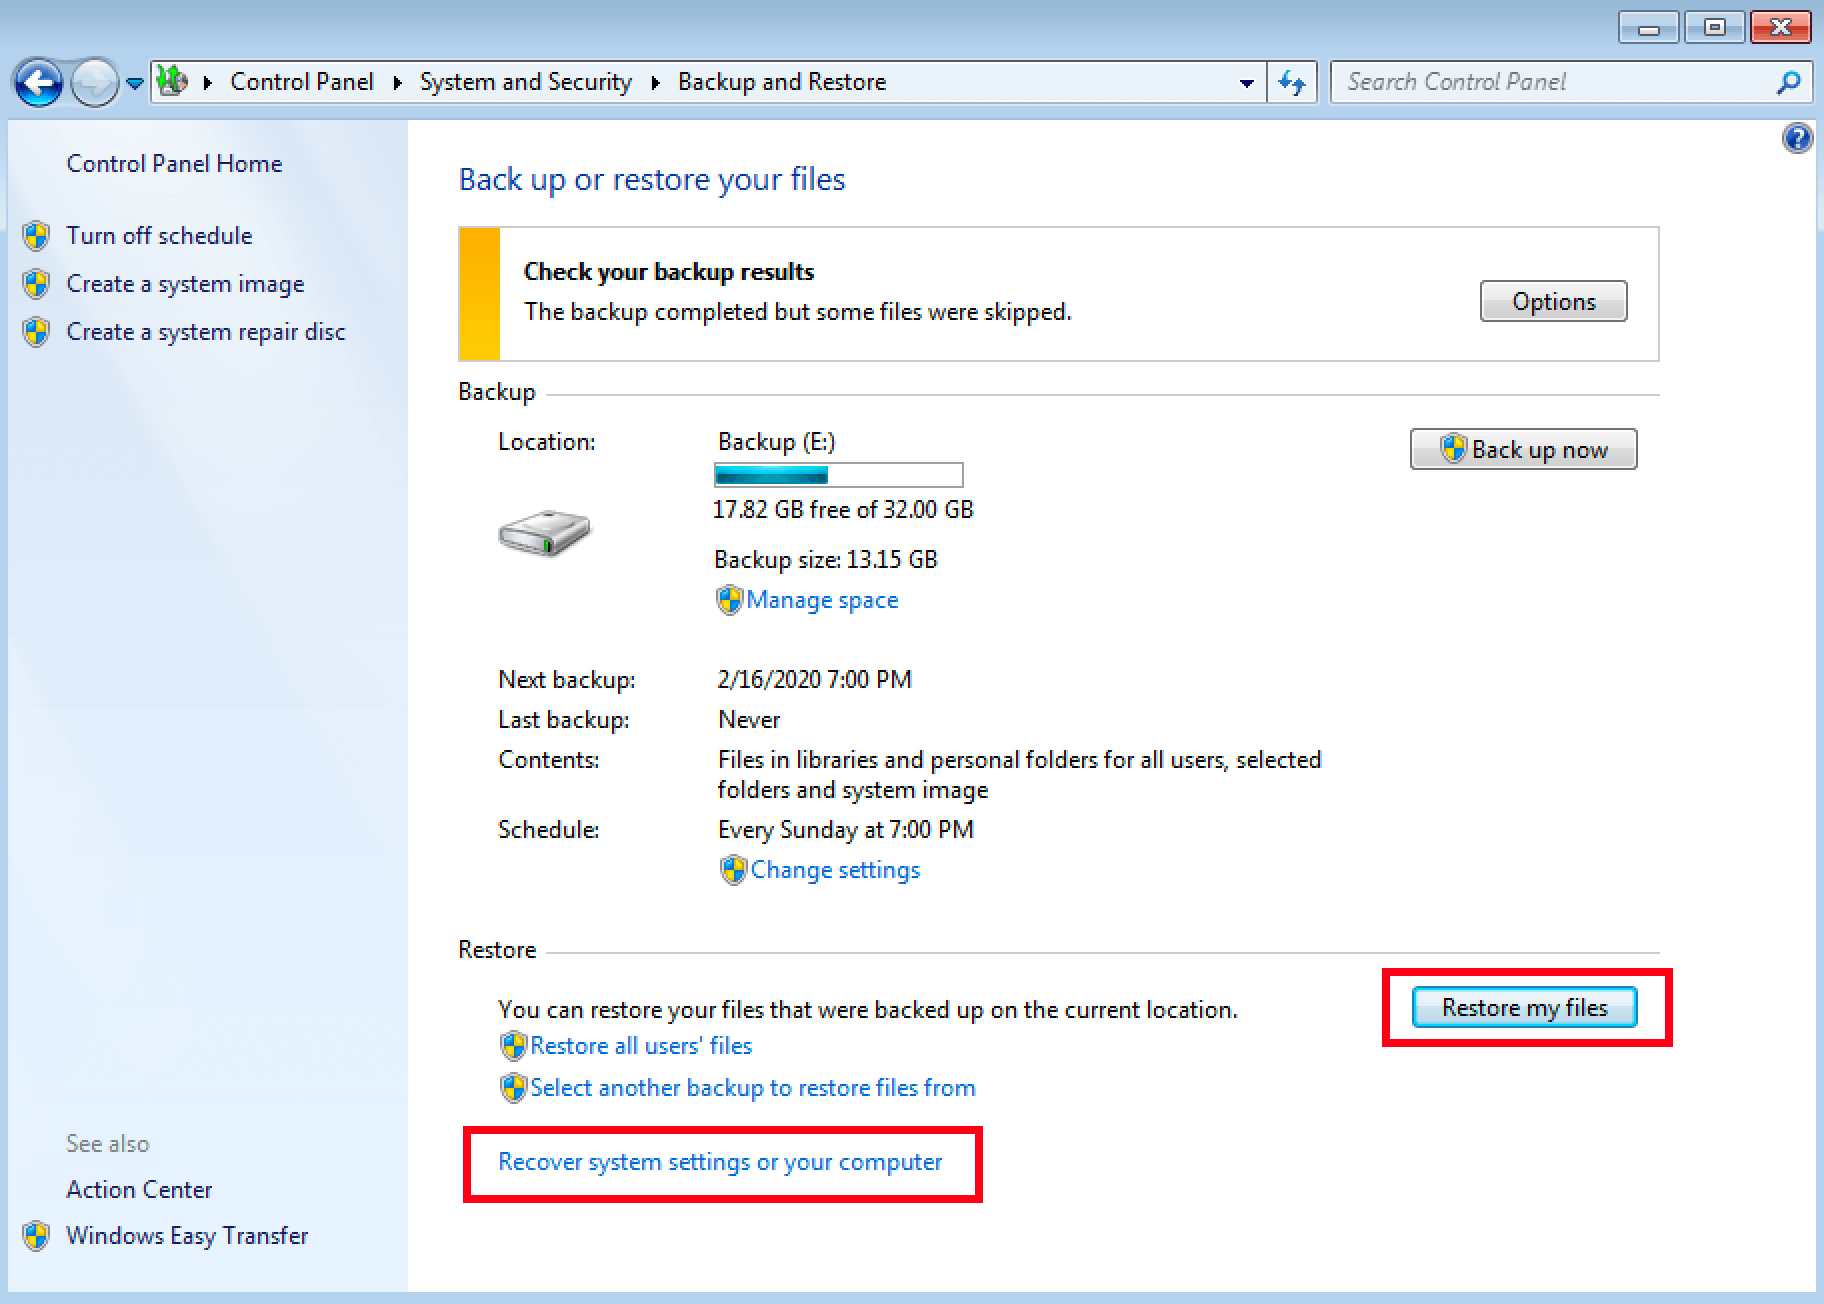
Open the Backup and Restore window from Control Panel > System and Security > Back up your computer (in Category view) or Control Panel > Backup and Restore (in large/small view). The options – Create a system image and Create a system repair disc – are offered to the user.

Step 2
Click Set up Backup option on the right-hand side. Choose the medium on which the backup is to be saved. It’s always better to store the backup on a different medium than your machine’s physical drive. Reading the Guidelines for choosing a backup destination may be of help. Click Next.

Step 3
Windows will now recommend that it chooses what all contents should be backed up. It is recommended that we select Let me choose option since Windows might miss important files and back up unwanted documents. It’s safer to choose as per our requirements. Click Next.

Step 4
Select all the files and directories you did like to include in the backup. Select Include a system image of drives option if you do not already have a system image, else it’s not necessary. Click Next.

Step 5
Review all your backup settings carefully before proceeding further. Cross-check the backup location, summary, and schedule. You can set a schedule for the backup to happen automatically after a specified period of time or simply off it from Change schedule > deselect Run backup on a schedule. Click Save settings and run backup.

Step 6
The backup process starts and the progress indicator is shown. Details can be viewed by clicking the View Details button. There’s also an option to stop the backup midway.

The settings for the next backup can be changed from the Change settings option, the schedule can be turned on from Turn on schedule, and previous backups can be viewed/managed from the Manage space option. Your data has now been backed up by Windows 7. Do you feel safer already?
Restore your backup data in Windows7
The backup created using the above steps can be restored in case your original files are lost, deleted, or corrupted. The freedom is given to restore the entire backup or choose individual files and directories.
Follow the below steps methodically to restore your backup data in Windows 7.
Step 1
Open Backup and Restore from the Control Panel. Click the Restore my files button to start the restoration process for the current user. In order to perform restoration for all the users, click Restore all users’ files.

Step 2
Select the files or directories which are to be restored by searching or browsing files/folders. Click Next once the required files and folders have been added.

Now choose the location where the data should be restored – it can be the original location or an entirely different location. Click Restore.
Step 3
The restoration process starts showing the progress bar. Let it complete entirely to restore all the backup data.

Once the restoration completes, a message Your files have been restored is shown. You can crosscheck the restored file by clicking View restored files, which will open the directory where the files are stored. Click Finish.

Note: Always keep a backup of your important documents and office data, since you never know what problem can crop up in your machine any morning.